How to Use Multiple Assignees in Jira
Do you need to use multiple assignees in Jira? You wouldn’t be the first person frustrated by this problem. If you’ve tried and failed to add issues with multiple assignees, don’t beat yourself up.
Here’s the hard truth: Jira, by default, doesn’t allow you to create issues that have multiple assignees.
Most of the time, this isn’t a problem as you can split up shared work into subtasks and assign it to different people.
But don’t give up!
When using Jira for project management there are some cases where you’ll want to associate people with issues, and a subtask isn’t a great fit. In those instances, you can use the workarounds I’ll show you here to add people to Jira issues, such as secondary assignees, collaborators, or other roles.
Can You Have Multiple Assignees in Jira?
By default, you can’t add multiple assignees to your Jira issues. However, there are workarounds you can use to associate people with Jira issues.
You should note that with all of these workarounds, all issues will still technically have one “real” assignee. As far as Jira is concerned, each issue can only ever have one assignee.
This means the time spent on the issue will not be split between multiple assignees or collaborators, and any time tracking, capacity planning, or other assignee based metrics and reporting will be based on the user in the default Assignee field.
With that caveat considered, here’s an overview of two methods you can use to add multiple assignees in Jira. Once you’ve read the overviews, move on to the step-by-step instructions for how to use each method.
Methods 1: Add Custom Fields in Jira
You can add custom fields directly in Jira to record additional assignees, collaborators, and other contributor types. I’ll explain how to do this in the section below.
A key limitation to this approach is that if you are working on a team-managed project you won’t be able to group boards, timelines, or other views based on these custom fields. However, you can do this by connecting your Jira instance to Visor.
Methods 2: Use Visor
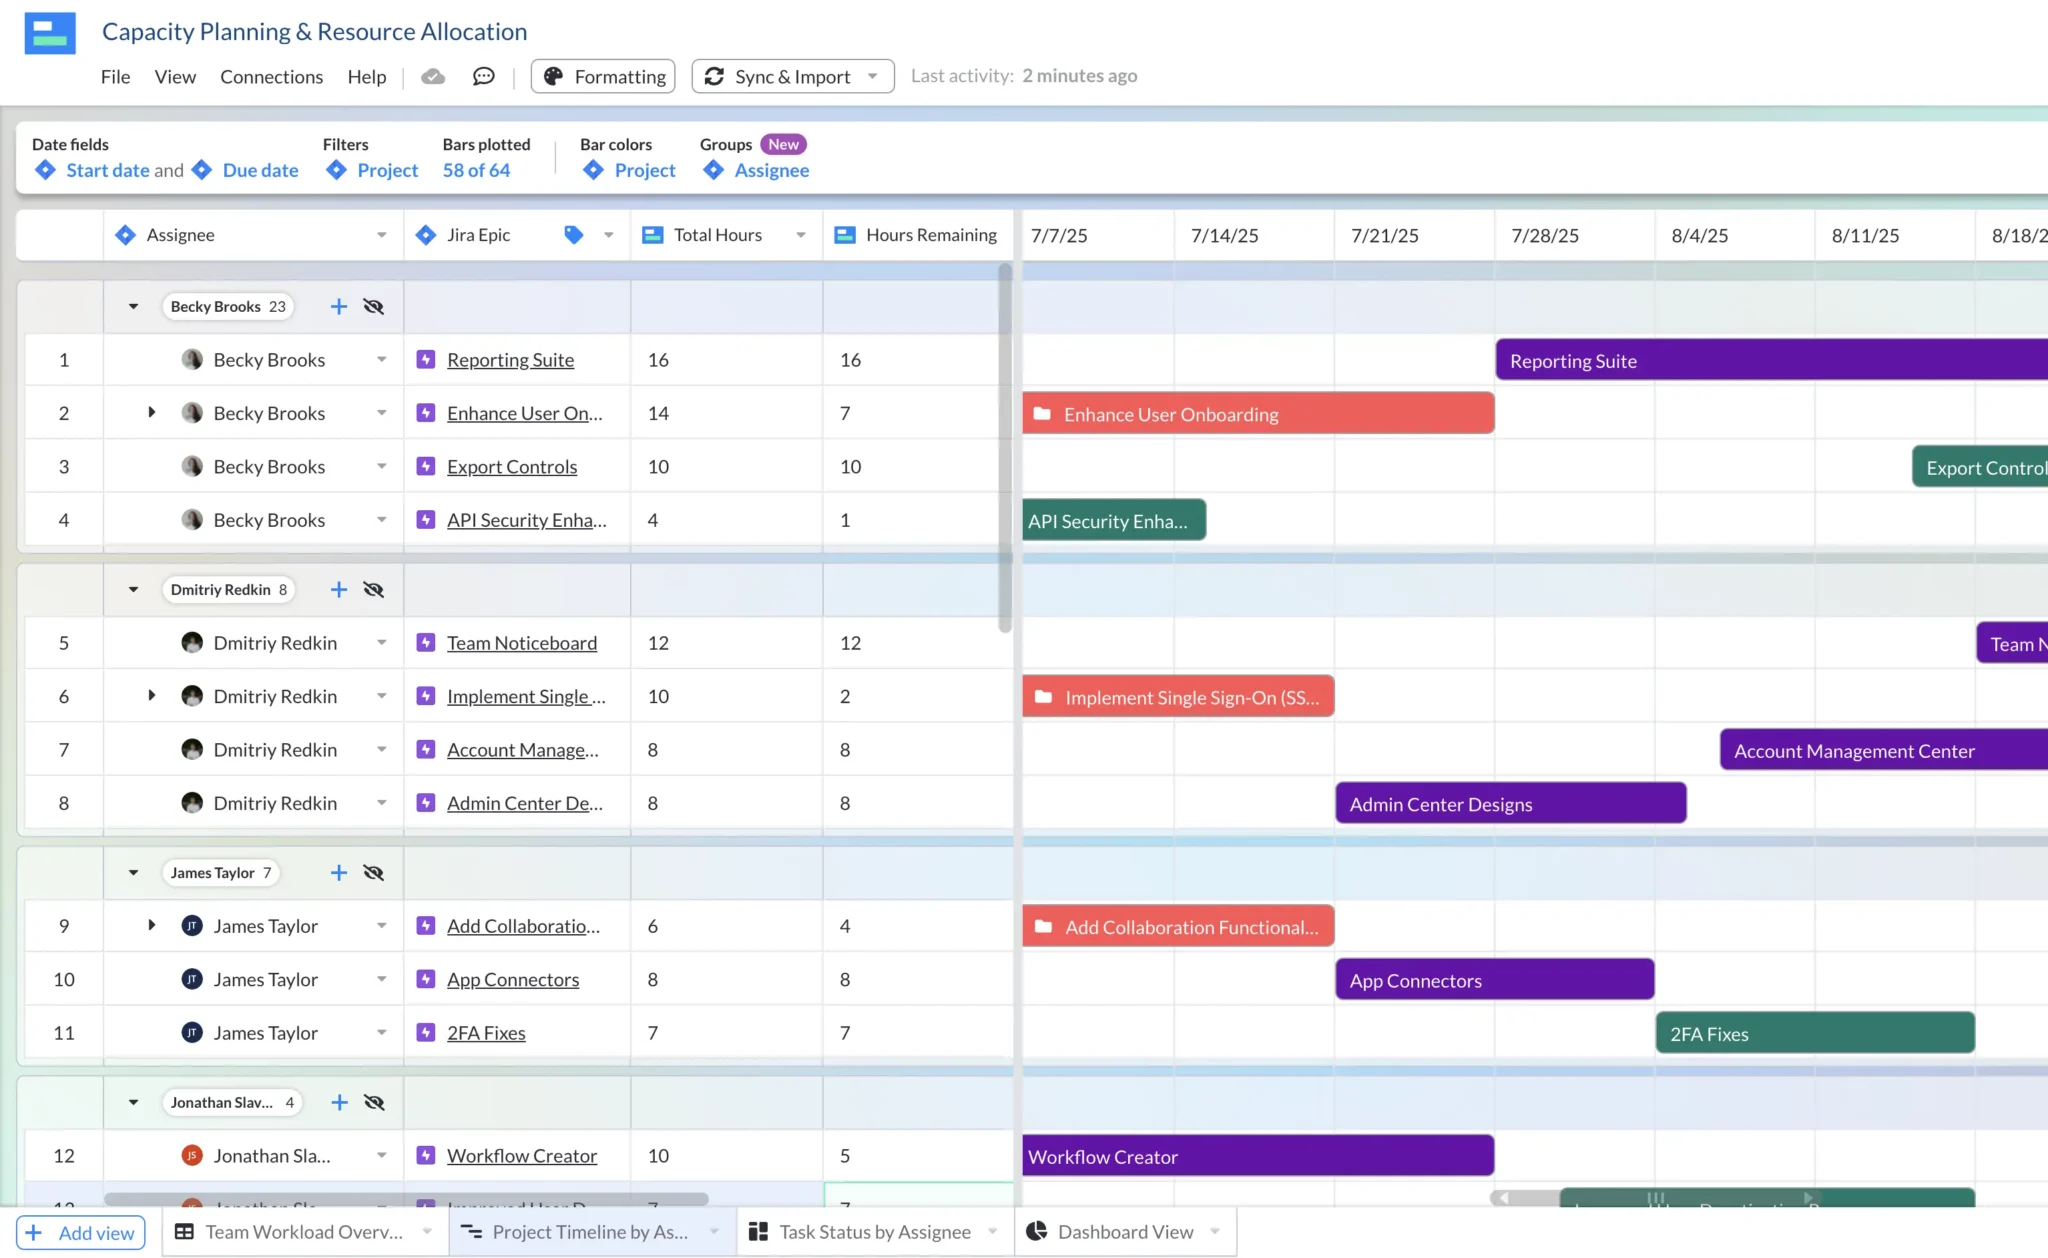
You can use Visor to view, group, manage, and report on Jira issues based on multiple assignees, or other collaboration based custom fields.
Visor has an advanced, two-way integration with Jira. You can import your selected Jira projects and visualize them as Kanban boards, Gantt charts/roadmaps, timelines, and spreadsheet views.
Unlike in Jira itself, you can group these visualizations using swimlanes based on Jira custom fields (such as 2nd Assignee, Reviewer, or Coordinator). You can also create custom fields directly in Visor to supplement your Jira data without impacting Jira itself.
In Visor, you can even add custom fields to support portfolio management in Jira, such as assigning a Program Manager or Portfolio Lead to a set of issues.
Because Visor’s Jira integration is so robust, it retains your Jira hierarchies and nesting intact, meaning your subtasks stay grouped with their parent issue, and stays in sync with any changes made in Jira.
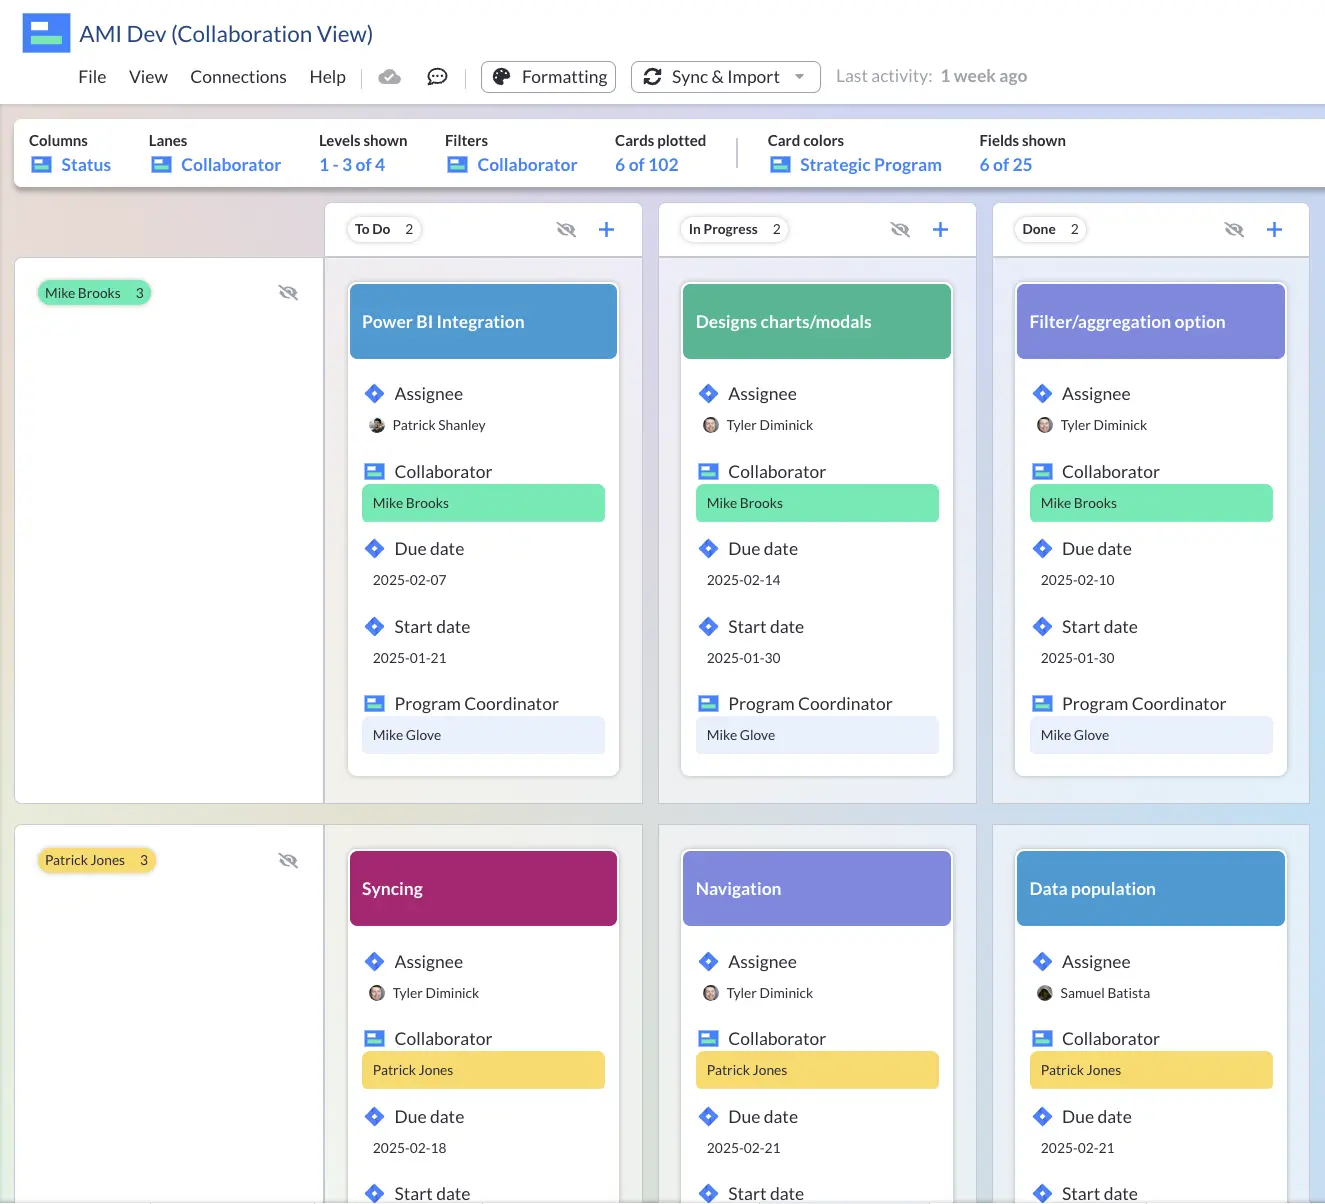
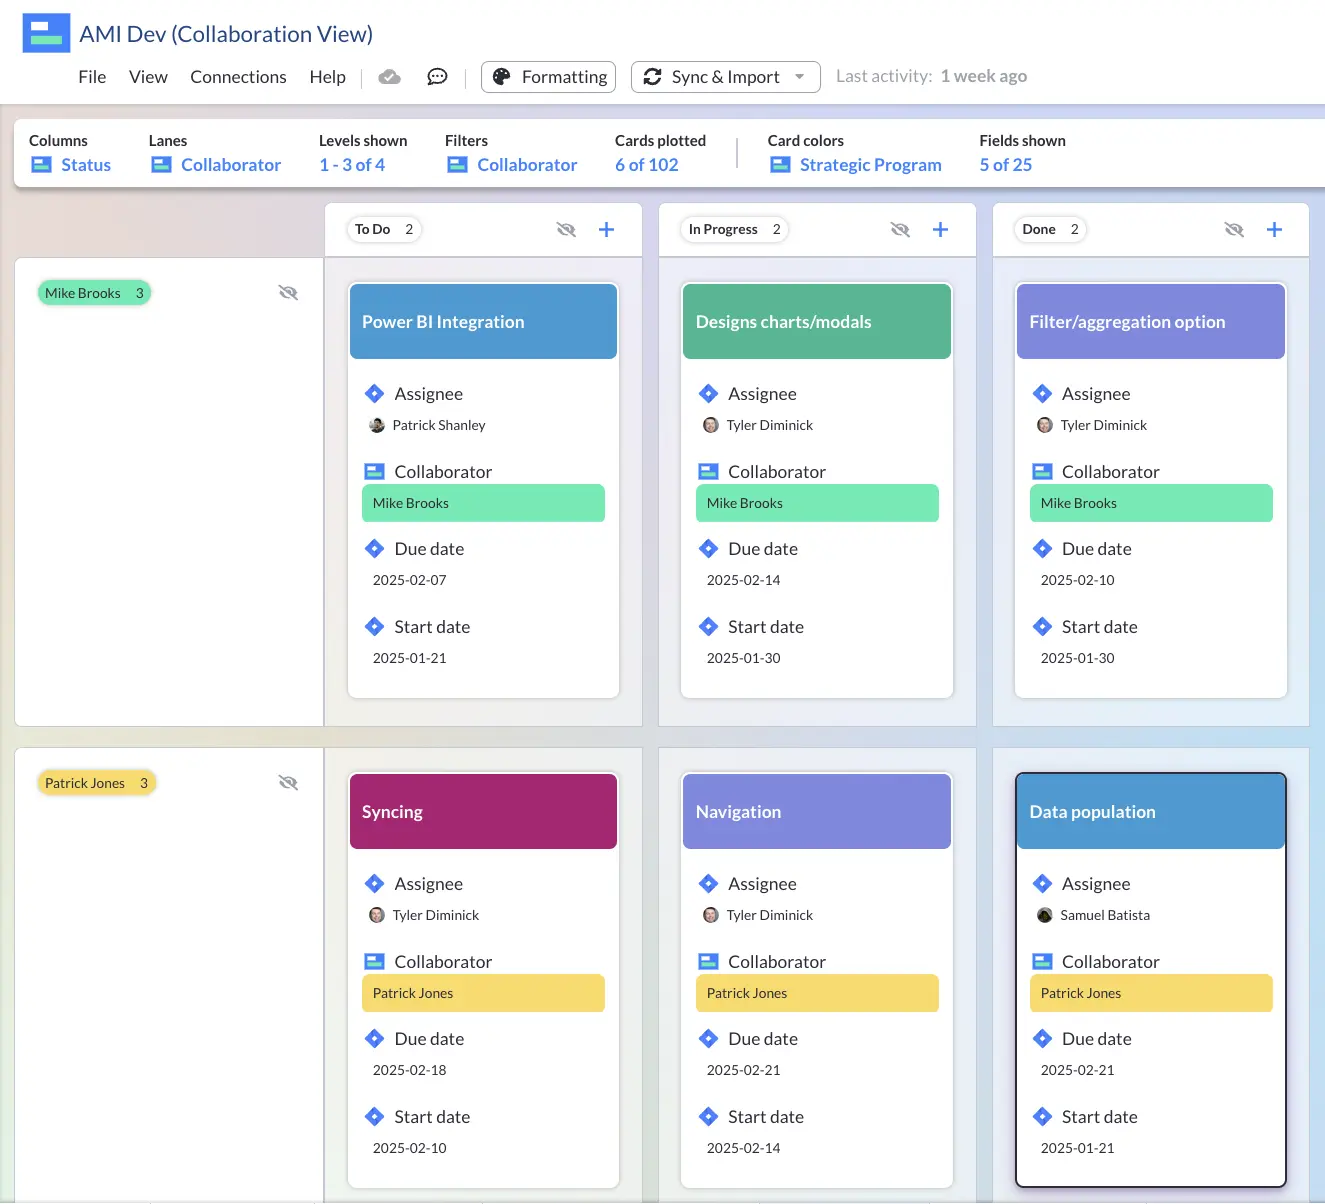
Here’s an example of a Kanban board view in Visor, showing my Jira project. You’ll notice there’s additional fields for Collaborator and Program Coordinator:
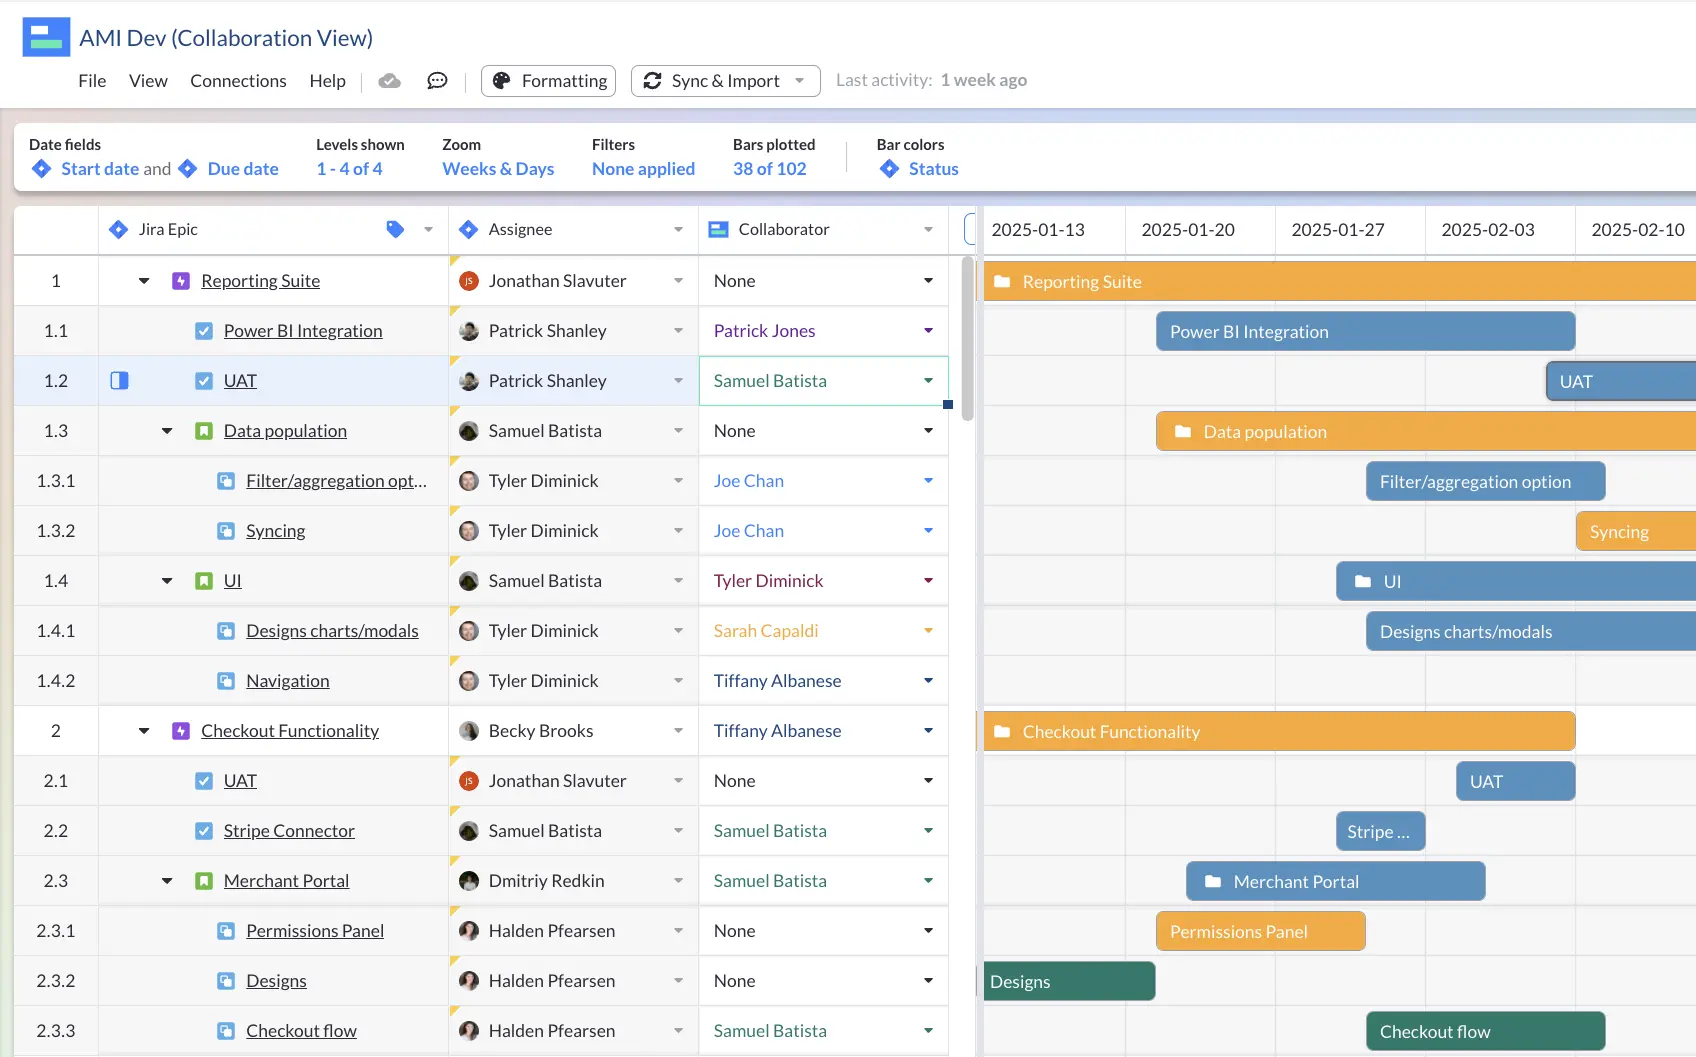
And here’s a Gantt chart, with “Assignees” and “Collaborators” that I created using Visor’s Gantt chart view:
How to create multiple assignees on a Jira issue
Using Custom Fields in Jira
To add multiple assignees directly in Jira you’ll need to create custom fields for the secondary assignee, either at an instance/organization level, or at an individual project level.
To add at the instance level:
- Click on “Jira Settings” in the top right corner. Then select the “Issues” tab
- Under the Fields section click on Custom fields
- When prompted to select a Field Type, choose User Picker (multiple users)
- Give the field a name, for example “Collaborator”. Add a description if desired and click Create
- In the next screen select which screens you want this field to be associated with
Using Visor
Follow these steps to add multiple assignees to your Jira issues.
2: Follow the steps to import your Jira data
3: If you’ve already added the secondary assignee fields in Jira directly then move on to “Jira Visualizations Using Multiple Assignees” below. If you prefer to add these fields as Visor custom fields then go to step 4.
4: After setup you should arrive in a Visor Table View, click the Add a field button on the right of the screen
5: Select ‘Dropdown’ and give the field a suitable name
6: Type or paste in the names of people for the dropdown menu, then click Add dropdown field
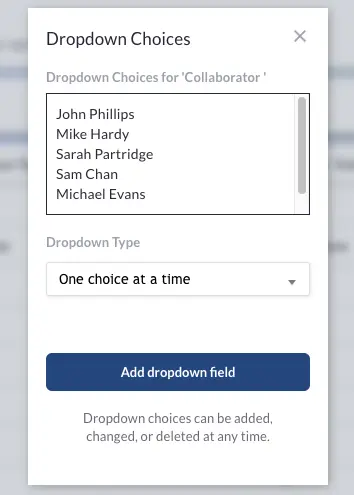
You can now use this field to log collaborators and other issue role types. You can create multiple Visor fields for any additional roles or responsibilities you want to record against Jira issues without creating them in Jira itself.
Jira Visualizations Using Multiple Assignees
You can easily use custom fields (created in Jira or Visor) as swimlanes to group Jira issues in your Kanban boards or Timeline Views in Visor.
This gives you the ability to create multiple views for primary and secondary assignees or other collaborative roles that matter to your team or organization.
You can also choose to prominently display secondary assignees or other roles on cards in the Board View or as columns in the Gantt View, making it easier to view shared workloads and collaborate.
Views can also be filtered based on these custom fields, making it easy to drill down to work that you are either an assignee, or a collaborator on.
To get started, simply click on an existing view type in Visor, for example, Gantt View or Board View, or click “Add view” to create a new view. If you’re creating a Timeline View or Board View, you can choose any field as your swimlane field.
You can also display these fields directly on the cards in the Board View or as columns in Gantt charts.
Here’s a Gantt View I created in Visor based on my Jira project, as you can see both the Assignee and a Visor custom field for collaborator is shown:
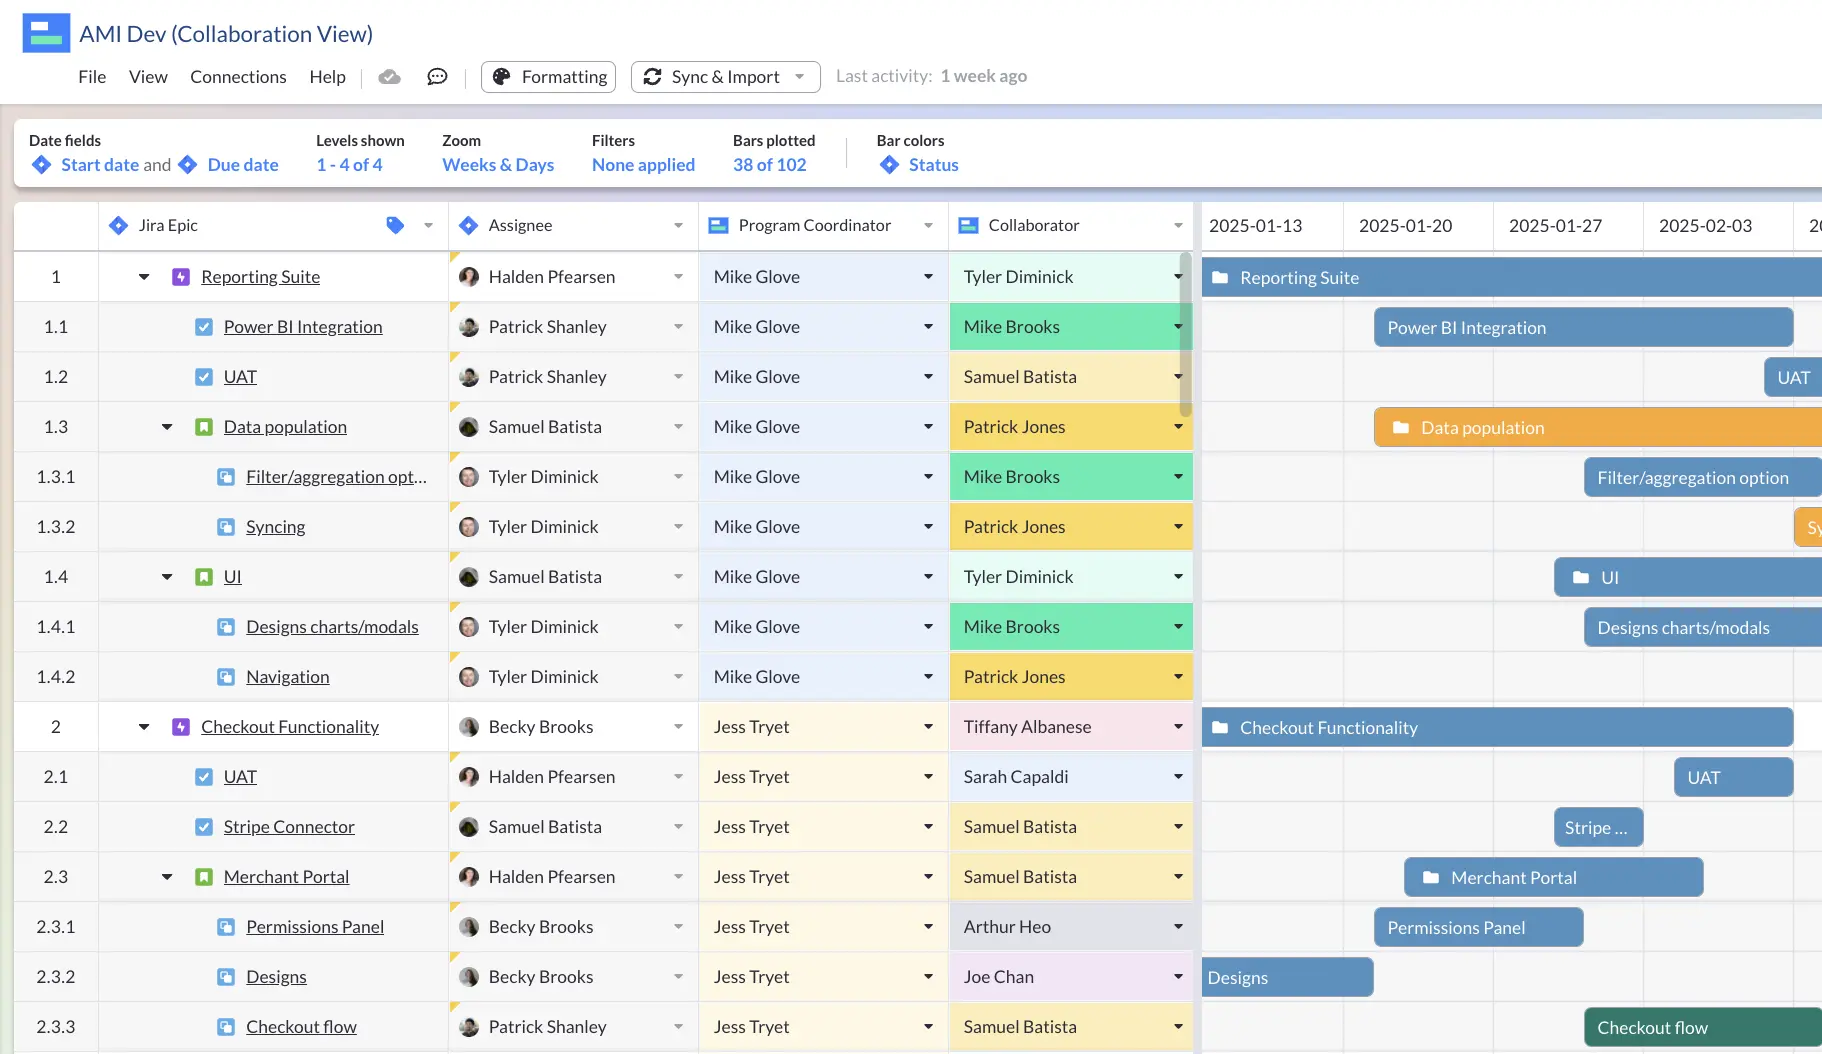
Here’s a Board View in Visor, using a custom ‘Collaborator’ field for the lanes and filtered by ‘Collaborator’ too:
Using Multiple Assignees in Jira – Recap
To recap, using multiple assignees in Jira is, strictly speaking, not possible. Jira only recognizes one assignee per issue. Subtasks usually work well to break down shared work and assign it separately to different people.
However, there are some instances where you want to add people to Jira issues without assigning them child subtasks.
You can achieve this by creating custom fields in Jira, but you won’t be able to group boards or timelines based on these custom fields (except for company-managed projects using JQL).
That’s where Visor comes in, as it gives you a way to easily visualize your Jira work based on secondary assignees, collaborators, and other criteria. Visor also offers a ton of Jira-friendly templates, such as capacity planning templates and product backlog templates.
With Visor you can also add roles above assignee to group issues and projects by the project manager, and if you are managing multiple projects in a portfolio (project portfolio management) you can also add attributes like the program manager, portfolio manager, or strategic goal the project supports.
This greatly expands your capabilities to view, manage, measure, and share your Jira projects, in visualizations that are crystal clear and easy to use.
Try Visor for free now to create your own collaborative views of your Jira workflows.


