
Agile Kanban Board Swimlanes: What They Are and How to Use Them
When it comes to Agile project management, Kanban boards offer a simple way to streamline workflows and boost collaboration. Kanban boards are useful because they can break up ideas into easily digested visual chunks. Swimlanes are an extension of that, adding horizontal organization to the vertical columns of your Kanban. As a result, Kanban boards with swimlanes become even easier to understand.
In this post we’re going to give you the basics on Agile board swimlanes, including:
- What Agile board swimlanes are
- Why should you use them
- How to apply them using Visor
Visor is a project porfolio management app that helps get your team aligned — no matter how spread out they are. You can also take advantage of its advanced swimlane capabilities in Visor’s Board view. Check it out for free – and get started even faster with one of our agile Kanban board templates.
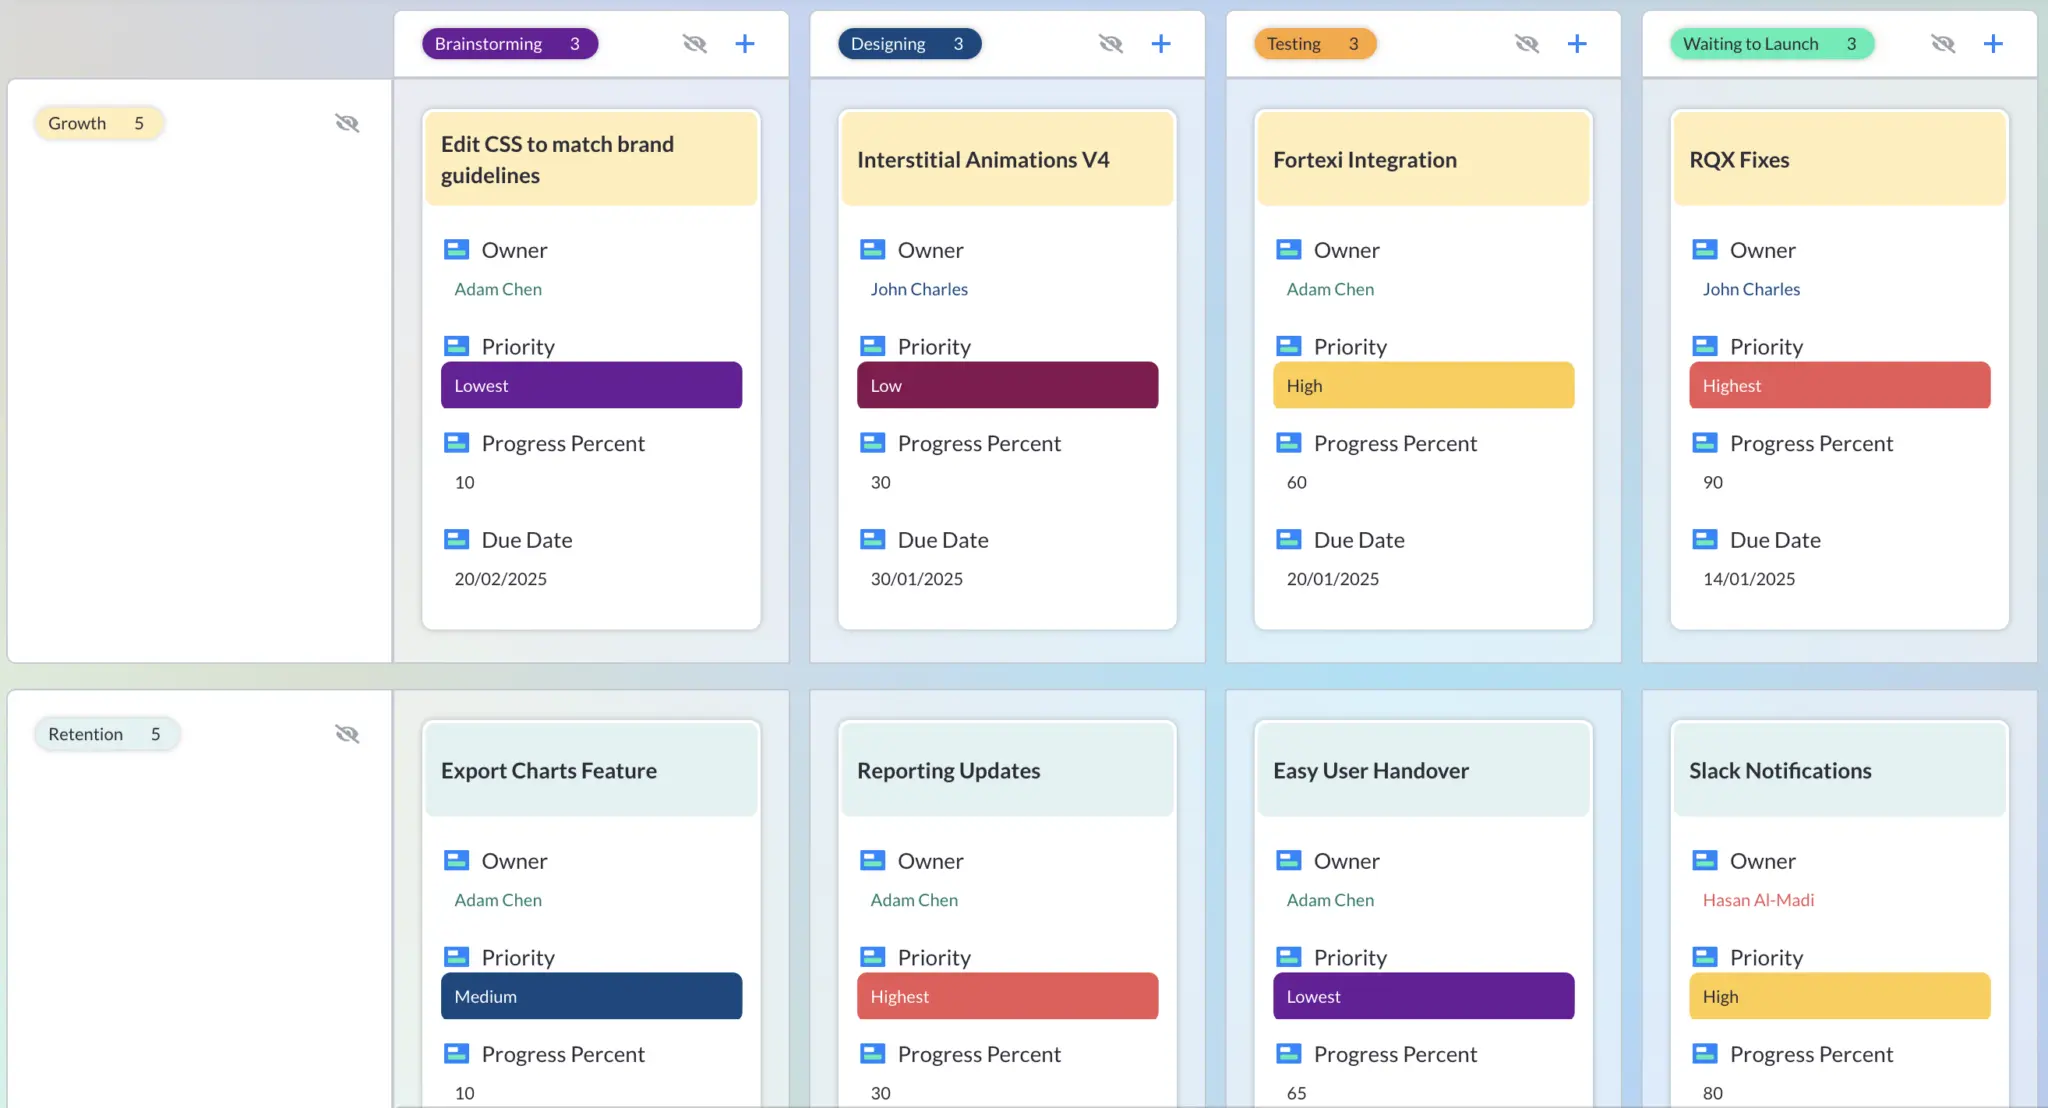
What are swimlanes in project management?
A swimlane diagram in project management is a type of flowchart that splits out the steps of a process into different lanes based on criteria, typically the person or department responsible for a specific task that is part of that process.
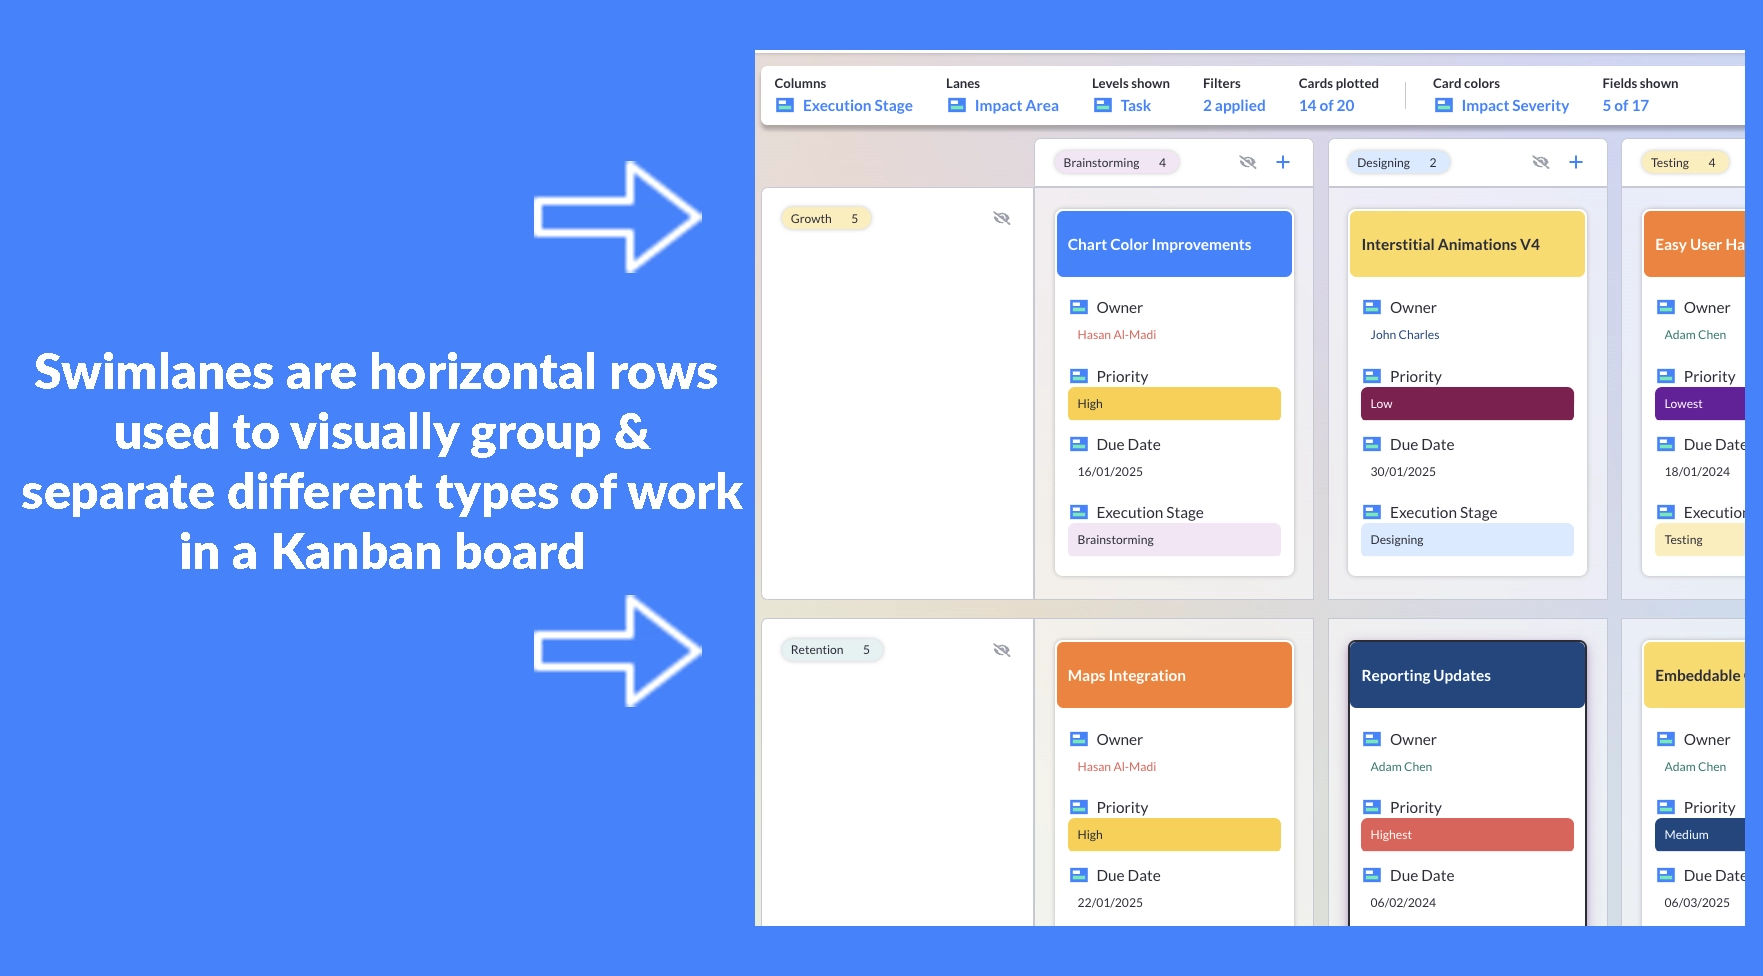
Swimlanes in agile project management have much the same purpose, to help organize and categorize chunks of work based on certain criteria, but their application in agile is more flexible, and typically built into Kanban boards and Timelines, as I’ll explain below.
What is a swimlane in Agile?
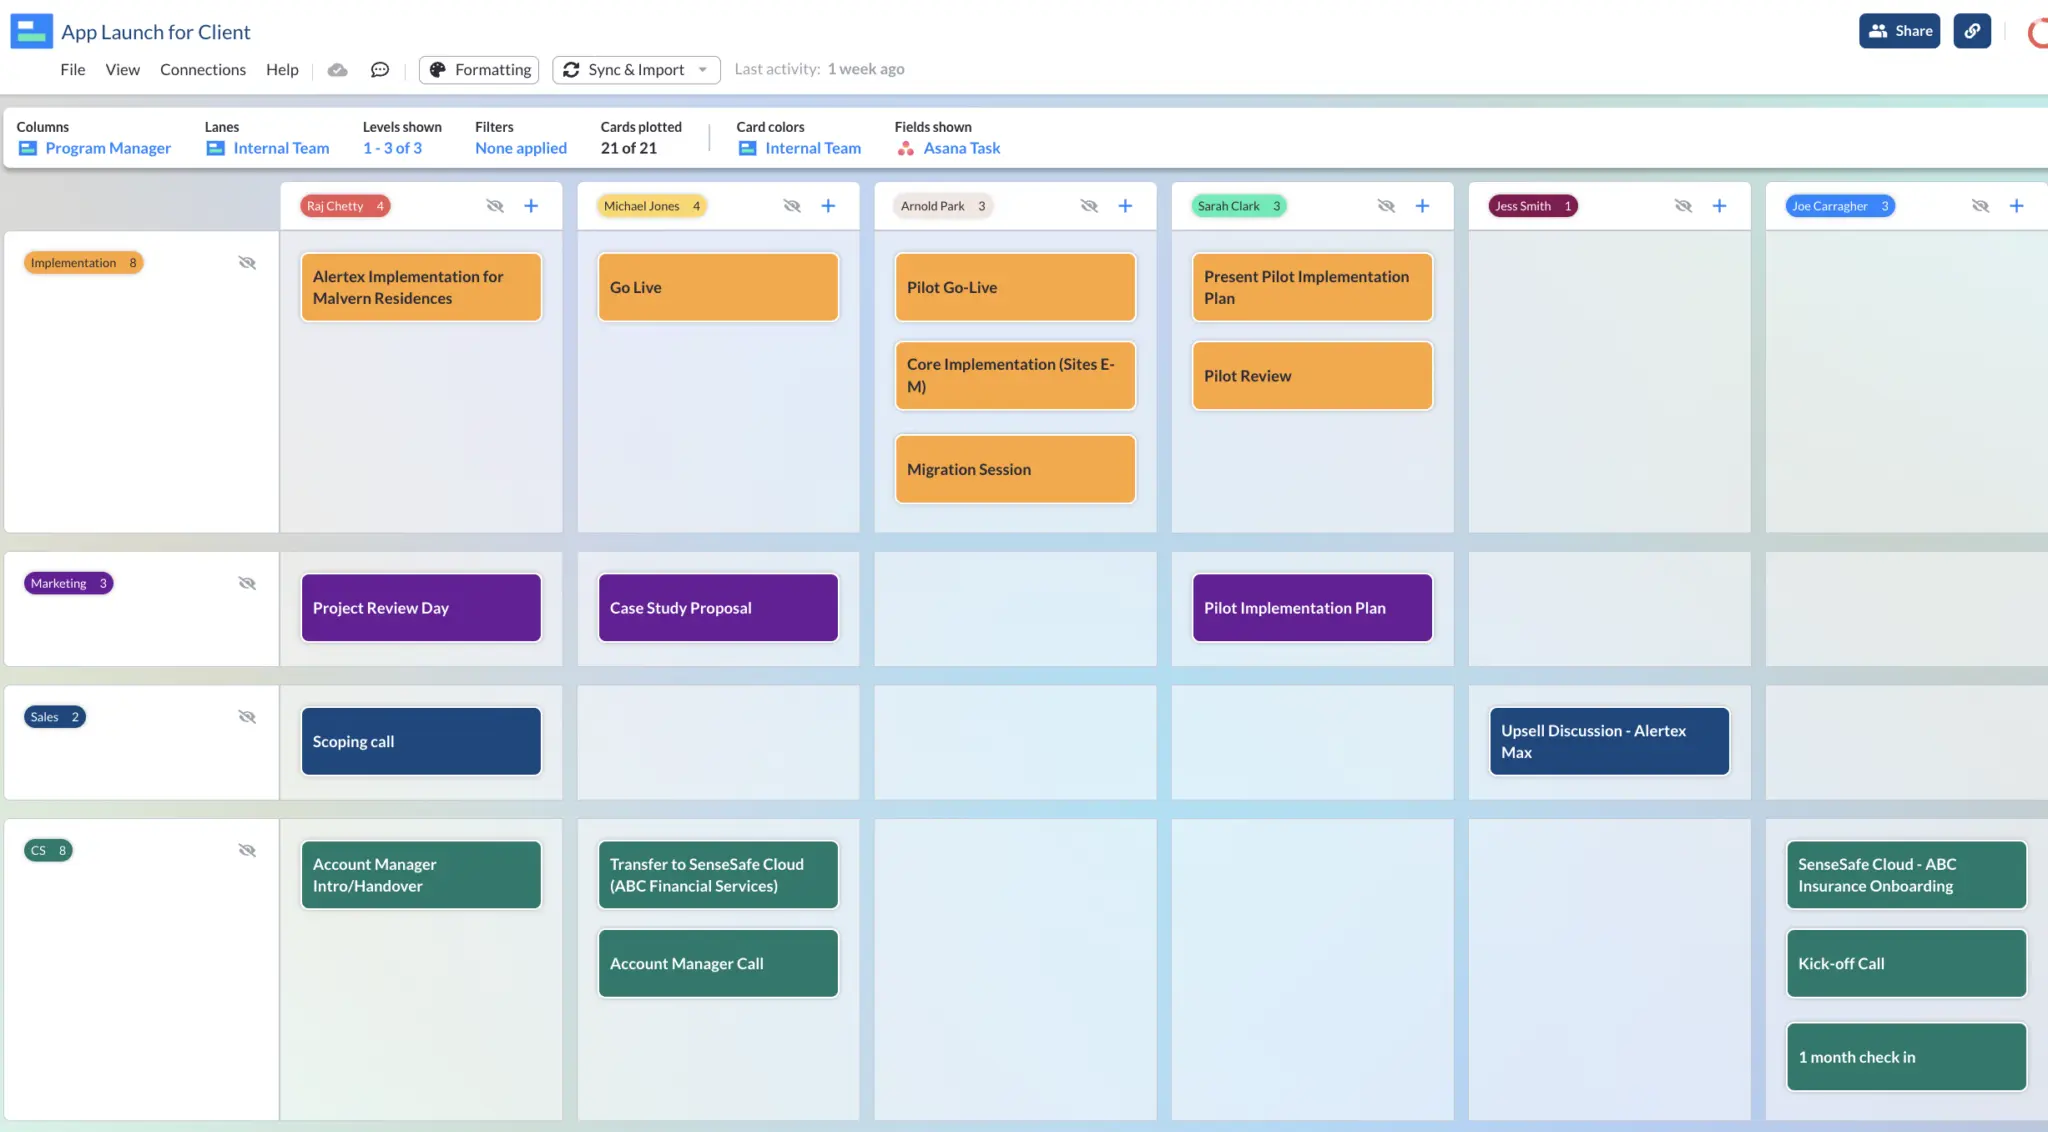
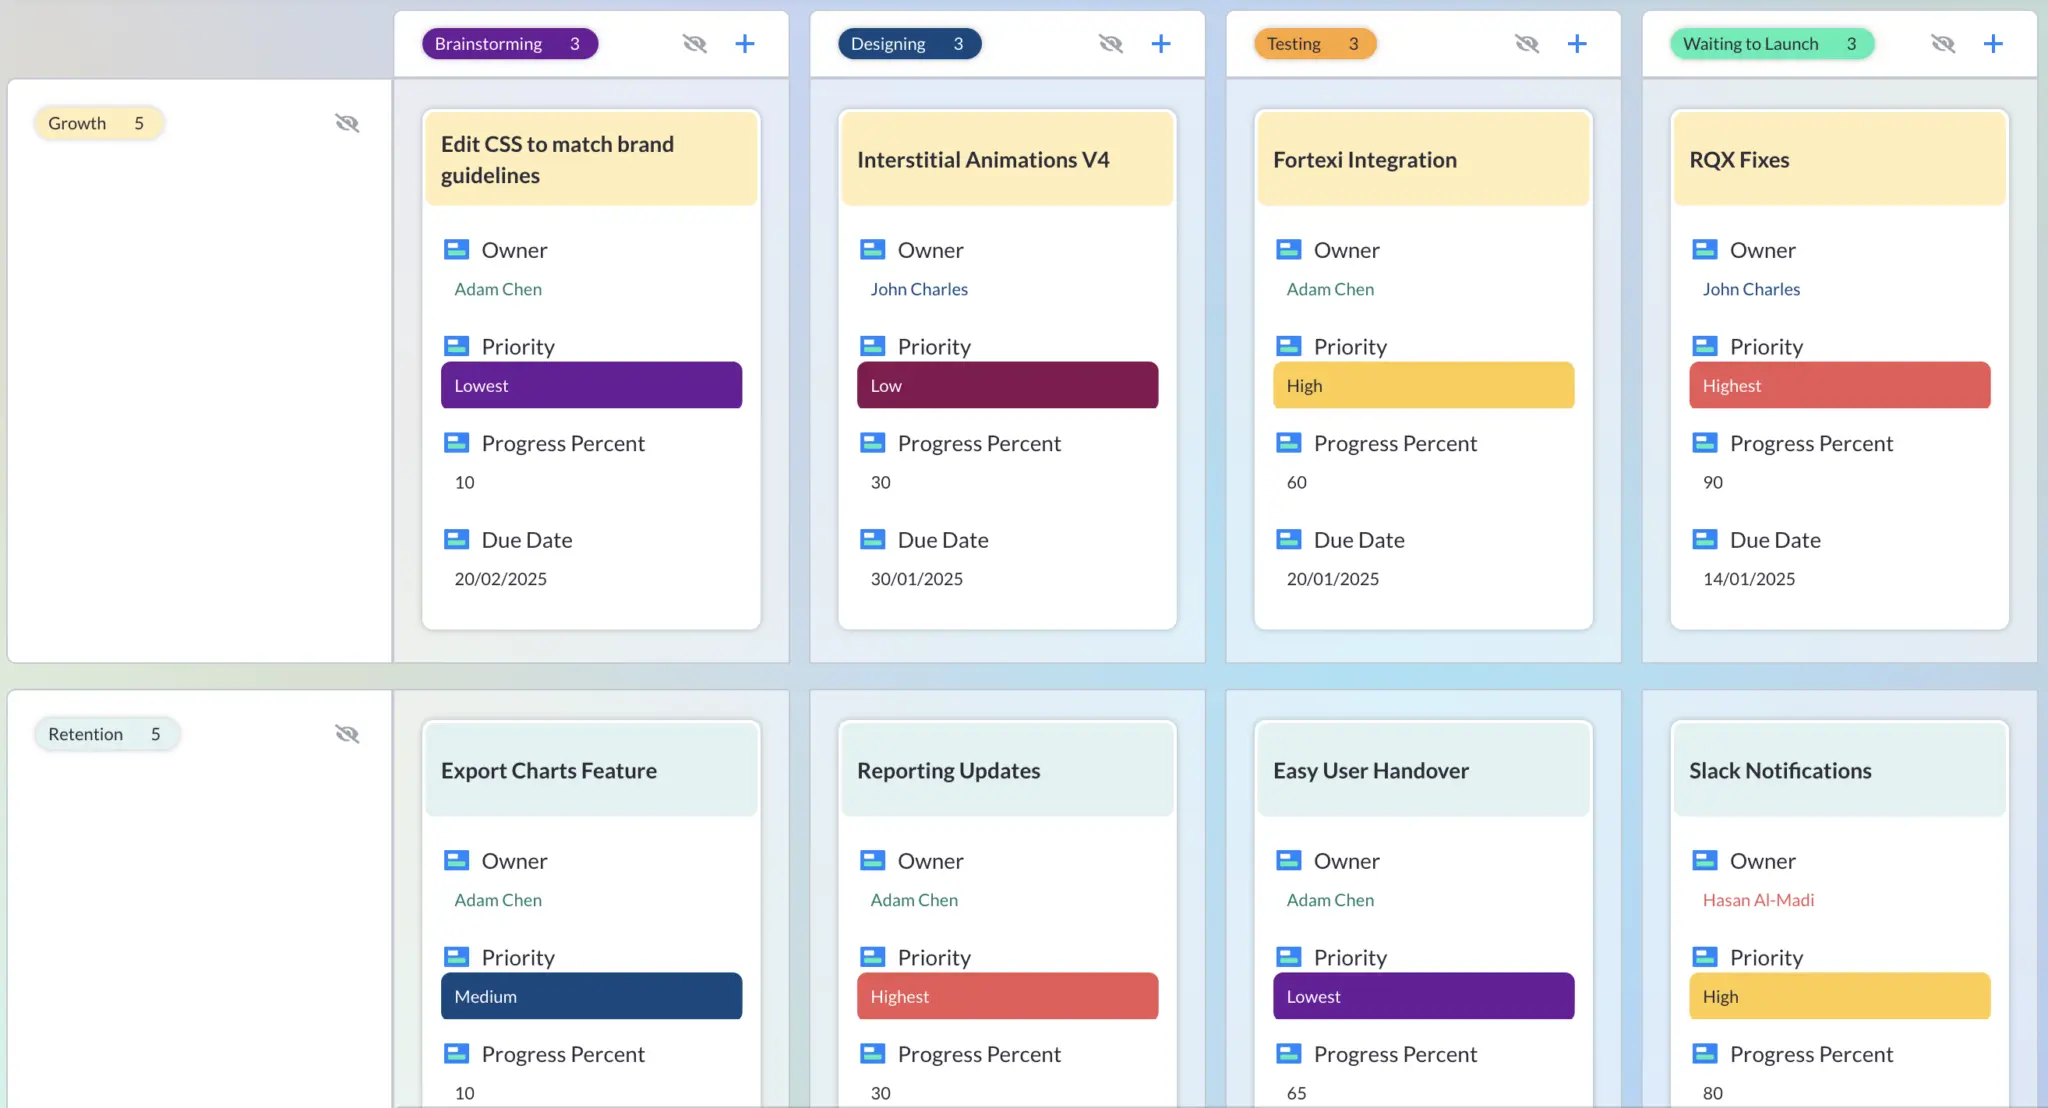
In Agile, a swimlane is a visual element in a Kanban board used to group related tasks or activities within a workflow. Swimlanes are usually represented as horizontal sections on a Kanban board.
Swimlanes help teams organize their work by breaking up tasks based on different criteria. You could have swimlanes based on team members, stages of development, types of work, etc.
For example, in a software development project, swimlanes might represent different stages of development (e.g., backlog, in progress, testing, done), different team members, or different types of tasks (e.g., bugs, features, improvements).
By using swimlanes, teams can get a clearer picture of the flow of work, identify bottlenecks, and ensure that tasks are progressing smoothly through the development process. They also provide a visual representation that helps team members understand their responsibilities and priorities.
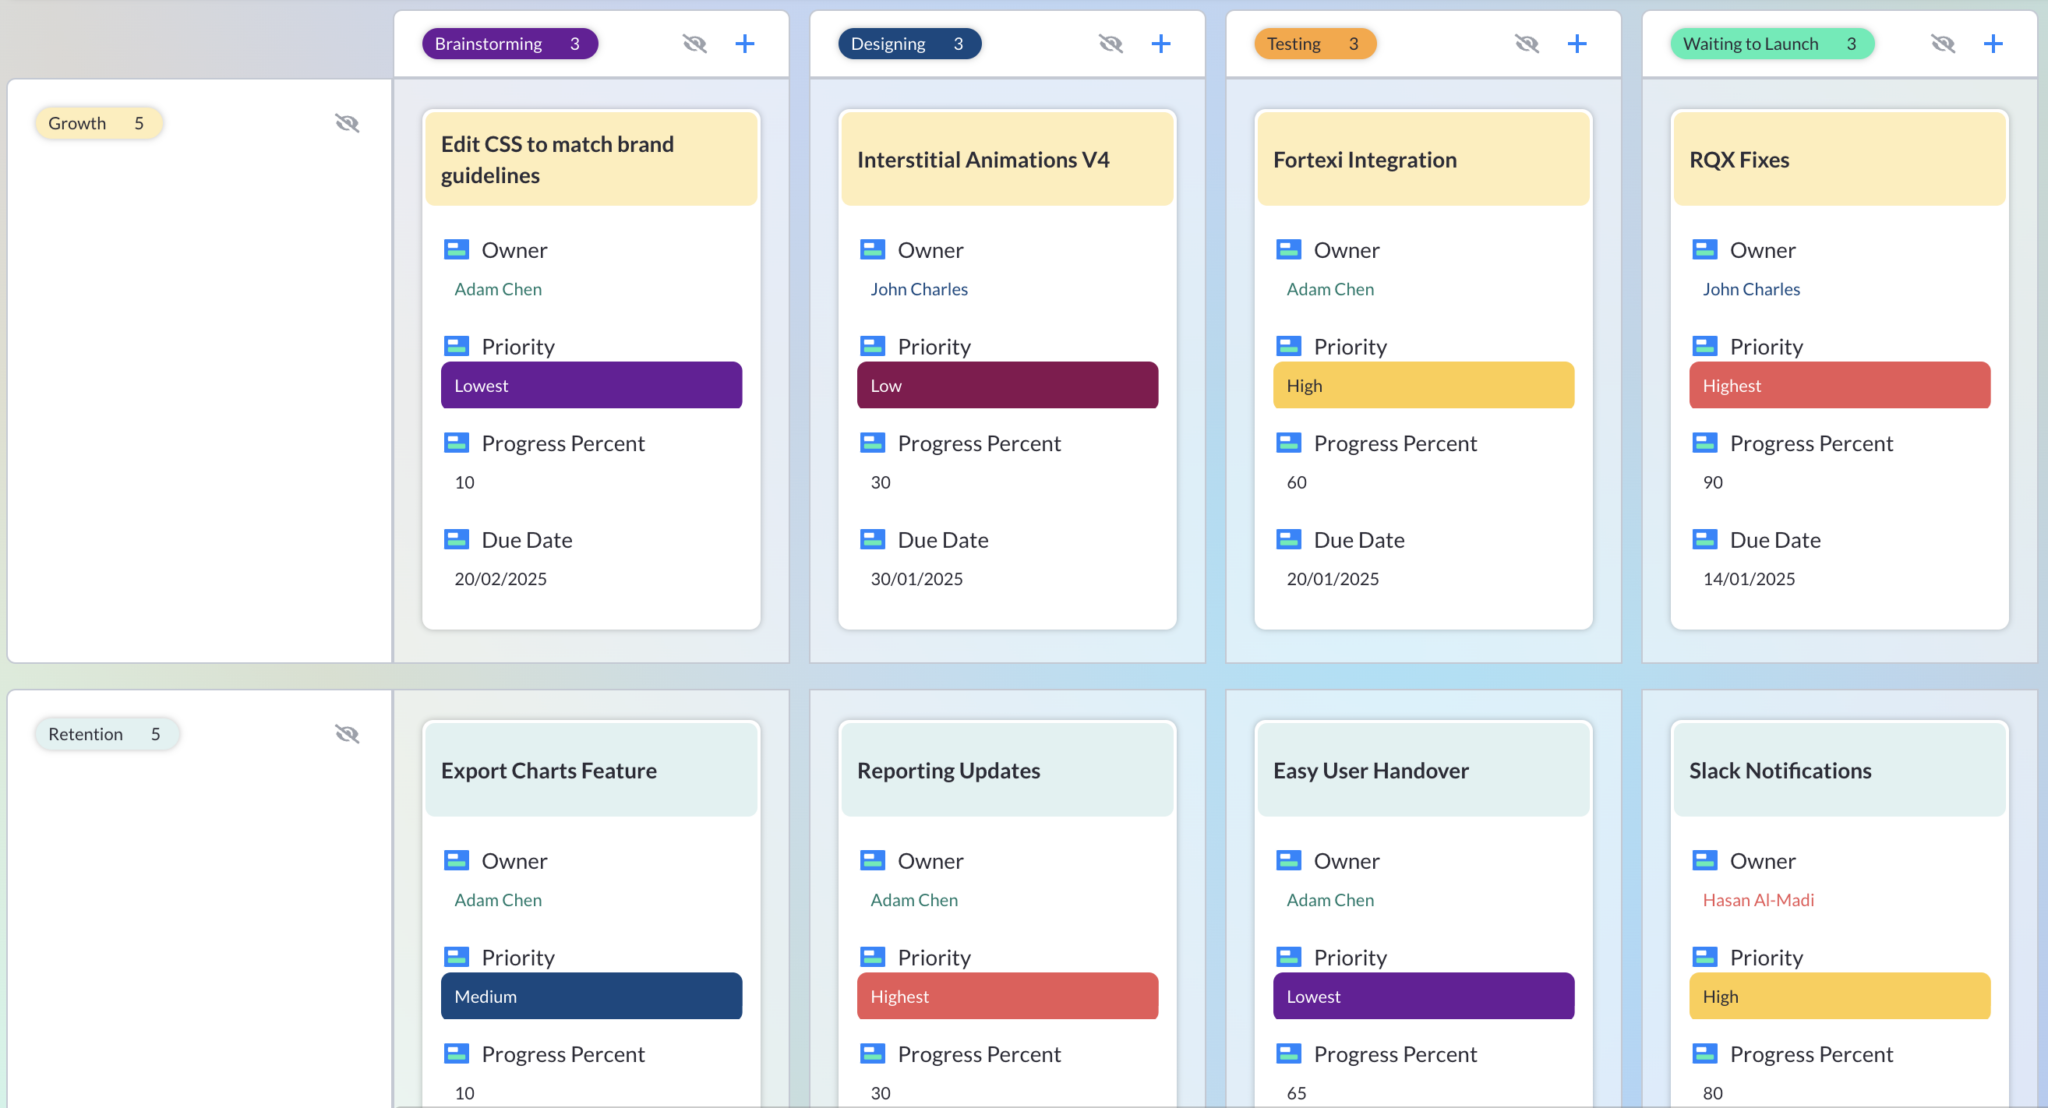
A Kanban Board With Swimlanes, made in Visor:
Using Kanban Swimlanes
When it comes to how swimlanes relate to Kanban, the short answer is a swimlane is a part of a Kanban board, breaking up information visually.
A Kanban board is a way to visually represent a project’s workflow. It’s made up of columns breaking up different stages of work. Tasks or user stories are represented as cards that move through the columns as work in progress.
Swimlanes are a way to further organize and categorize tasks within a Kanban board. Basically, they add horizontal sections to your Kanban board that can represent different categories of work. They let you group related tasks together, making it easier for teams to understand responsibilities and priorities.
While a Kanban board gives you a visual representation of the workflow, swimlanes offer a way to organize tasks within that workflow into different categories or groups.
Benefits of Agile Board Swimlanes
So why would you want to use swimlanes in the first place? There are a few compelling reasons:
- It simplifies accountability: Swimlanes make it easier to assign ownership of tasks or user stories to specific teams or team members. This promotes accountability and ensures that everyone understands their responsibilities within the project.
- You’ll clarify information: Sometimes one big Kanban board can be hard to break down into meaningful tasks. Swimlanes further divide the larger board, cutting back on confusion and making it easier to find the info you need.
- It offers more effective workflow management: Swimlanes let teams visualize the flow of work across different stages or aspects of the project. This helps identify bottlenecks, streamline processes, and ensure a smoother workflow from start to finish.
- You can coordinate teams: In larger projects or those involving multiple teams, swimlanes can help coordination by providing a clear overview of each team’s work. This lets you avoid duplication of effort and ensures that tasks are distributed evenly among team members.
- It’s easier to set priorities: You can use swimlanes to organize by priority, making it easier to spot high-priority tasks and ensure they get addressed.
- You can customize layout: In most cases, Kanban boards allow you to set up swimlanes to fit your needs, whether that’s by assignee, stages of development, priority levels, or any other categorization that makes sense for your team.
What are the different types of Agile board swimlanes?
Now that you know why you should use swimlanes, let’s talk about how you can use them.
There are no hard-and-fast rules for swimlanes – you can organize your data however you like, and the way you organize it is probably based on the type of project and your team’s structure.
It can also vary based on the software you’re using. For instance, Jira offers six Agile board swimlane options:
- Queries
- Stories
- Assignees
- Epics
- Projects
- No Swimlanes
However, if you need more options, there are other Jira connected apps and Jira plugins that give you more freedom to customize your board swimlanes. In Visor, for instance, you can customize each swimlane (as well as cards and columns) by:
- Assignee
- Level of Effort
- Project
- Status
- Issue Type
- Fields imported from Jira
- Custom fields made in Visor
This effectively lets you sort your information in any way you like. That being said, there are a few popular options for setting up your swimlanes. Here’s what to try if you’re not sure where to begin:
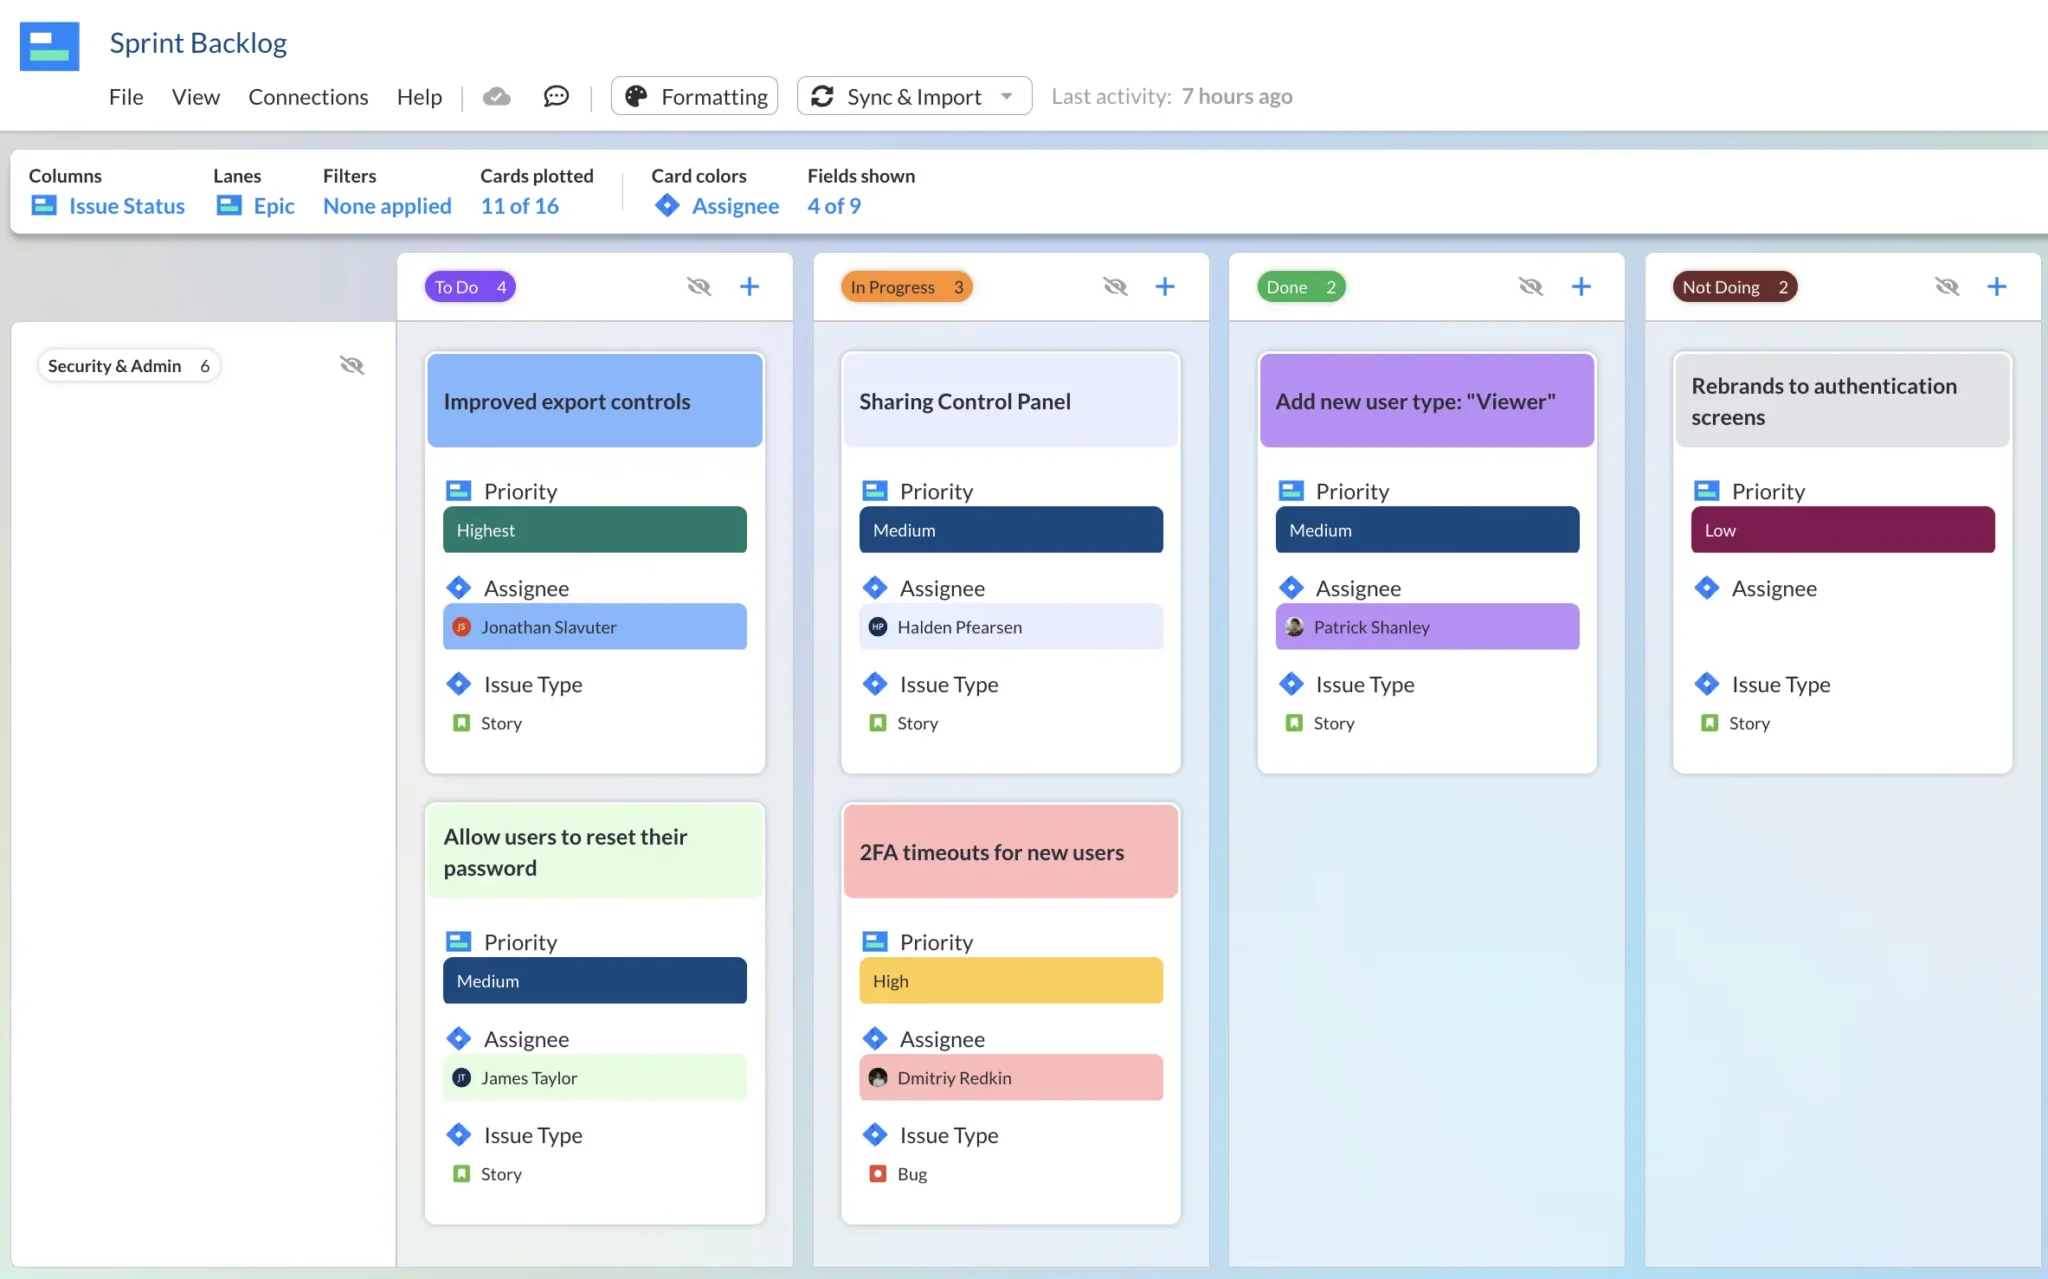
- Priority swimlanes: This type of swimlane lets you prioritize tasks based on their importance or urgency. Tasks with higher priority may be placed in one swimlane (usually the one up top), while lower-priority tasks are placed below.
- Swimlanes based on individuals, teams or departments: Team or departmental swimlanes organize tasks or user stories based on the team or individual responsible for completing them. Each swimlane represents a different department, team, or individual, allowing for clear assignment of tasks and accountability.
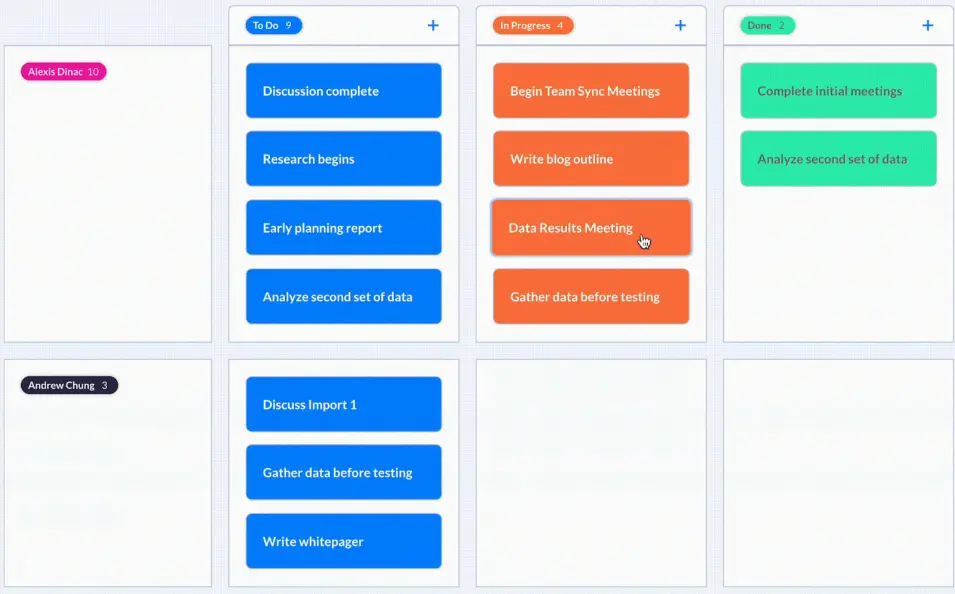
- Functionality-based swimlanes: These swimlanes group tasks or user stories based on functional areas or modules of the product being developed. For example, swimlanes could represent features related to user interface, backend functionality, security, etc.
- Stage swimlanes: Stage swimlanes categorize tasks based on different stages of the development process. In this case, swimlanes could represent stages such as backlog, analysis, development, testing, and deployment.
Example created using Visor’s Sprint Backlog Template:
- Swimlanes for customers or clients: If you cover multiple clients or customers, you can break down each into its own swimlane to organize work for each client.
Visor offers other types of views, like our Table and Gantt view, that can help you visualize project data for others. We also offer a client onboarding templates and Jira guest access capabilities.
- Release swimlanes: Group tasks or user stories can be broken up based on the release they are intended for. Each swimlane represents a different release or sprint, allowing teams to track progress and plan accordingly for each release cycle.
How to Create Agile Board Swimlanes in Visor
Visor lets you share your Jira, Salesforce, and Hubspot data from one central location, so stakeholders that don’t use that software get insight into what’s going on behind the scenes.
As part of Visor, you have access to Board View, which lets you display data in a Kanban-board format – including with swimlanes. Here’s how to add them to your Board View.
Step 1: Create Your Free Visor Workspace
Click here to open the Visor app, add your email and follow the setup flow to reach your workspace in a couple of minutes. Visor is free to try and has a free plan you can continue using if you decide you don’t need to upgrade (and there’s no ask to enter any credit card or other payment details either!)
Visor has powerful two-way integrations with Jira and Asana. You can connect Visor with your apps as part of the setup process. You can also connect apps at any time but it makes sense to get your data in at the earliest opportunity to start visualizing it in Visor in your most preferred way.
Step 2: Open Board/Timeline View
Since swimlanes are a feature of Kanban boards, you’ll want to open Visor’s Board View, if you haven’t already.
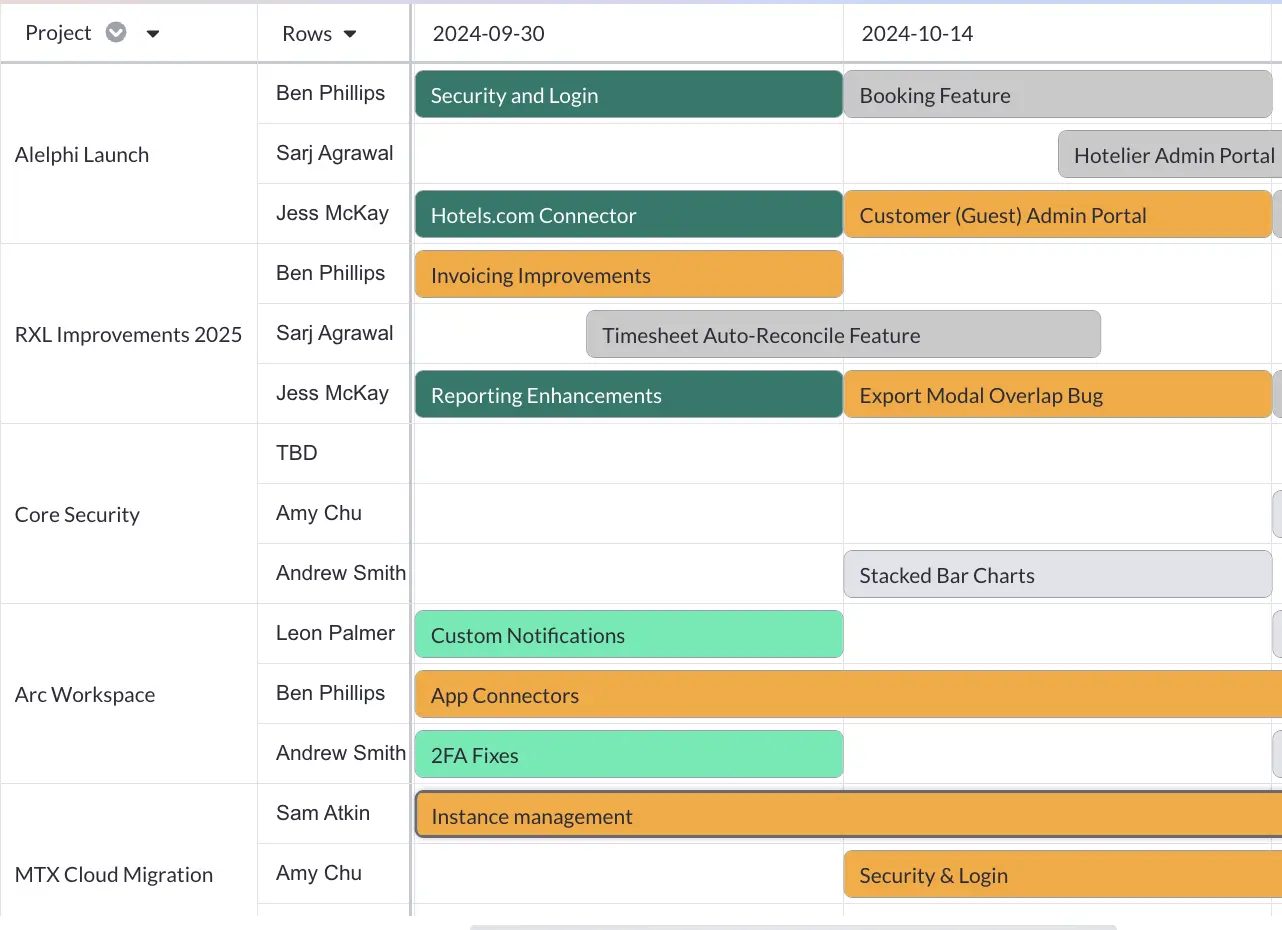
Although timelines are not strictly agile, there may be situations where you need to create, present, or share your projects on a timeline. The good news is that you can quickly add a timeline (with swimlanes) based on your Kanban based projects using Visor’s Timeline view.
A Timeline view in Visor, showing several projects in a portfolio, with swimlanes for Project and rows for Assignee:
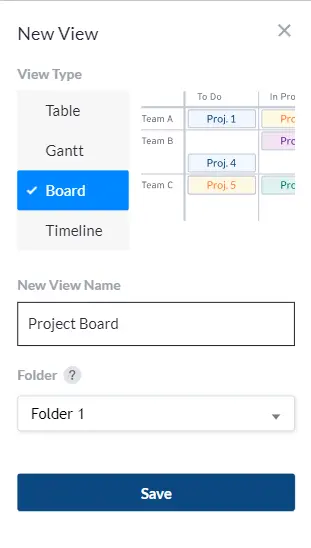
To add either view type, start by opening the workbook you want to use. Then look at the bottom left-hand corner of your screen to find the Add View + button. Select it and a popup will appear, prompting you to select the type of view you want. Select Board View, name your View, if you like, and select Save.
Step 3: Set Your Agile Board Swimlane
After you hit Save, a new popup will open. You’ll see the option to fill in Plotted Data. From here, you can select which field you’d like to use to create the columns in your Board and you can also choose which field to use for your swimlanes. Simply click on the Lanes Field dropdown menu and make your selection. If you don’t see what you want, you can select Import Field from Jira to add another field.
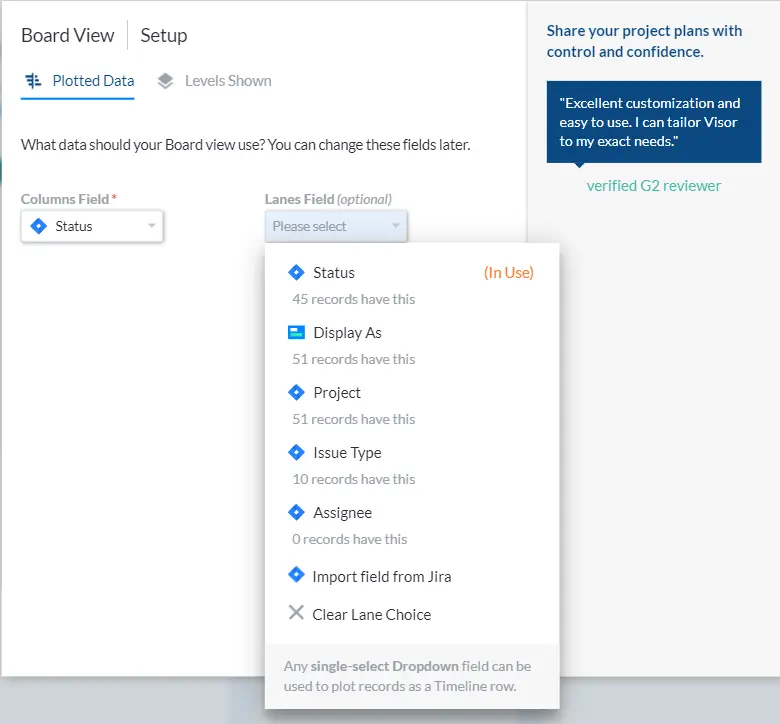
Complete the rest of the popup and select Finish Setup. Your Board View will open.
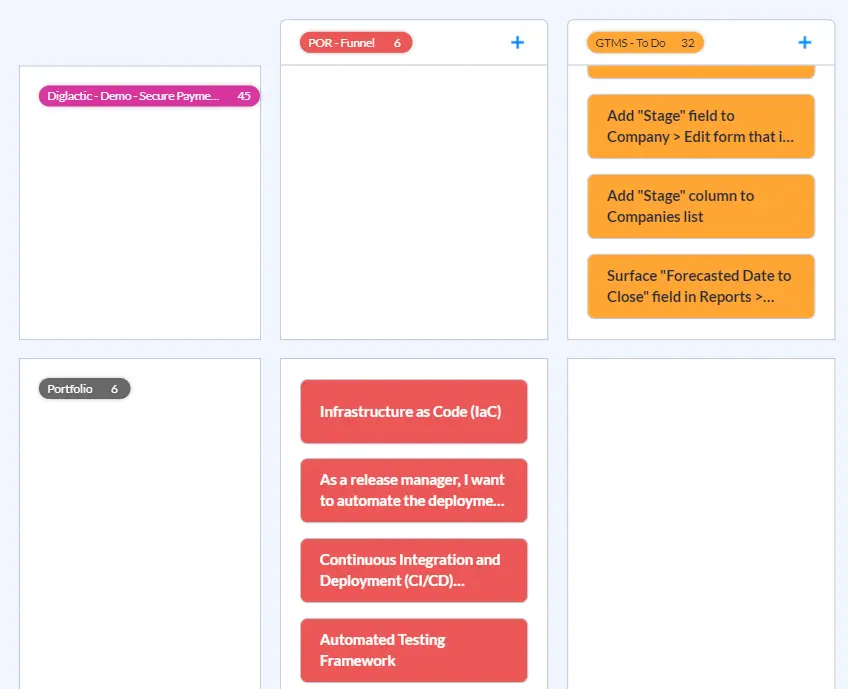
Step 3: Make Changes to Your Agile Board Swimlanes
You can also change or add swimlanes from Board View. Just above your Board, you’ll see a few dropdown menus, including one labeled Lanes.
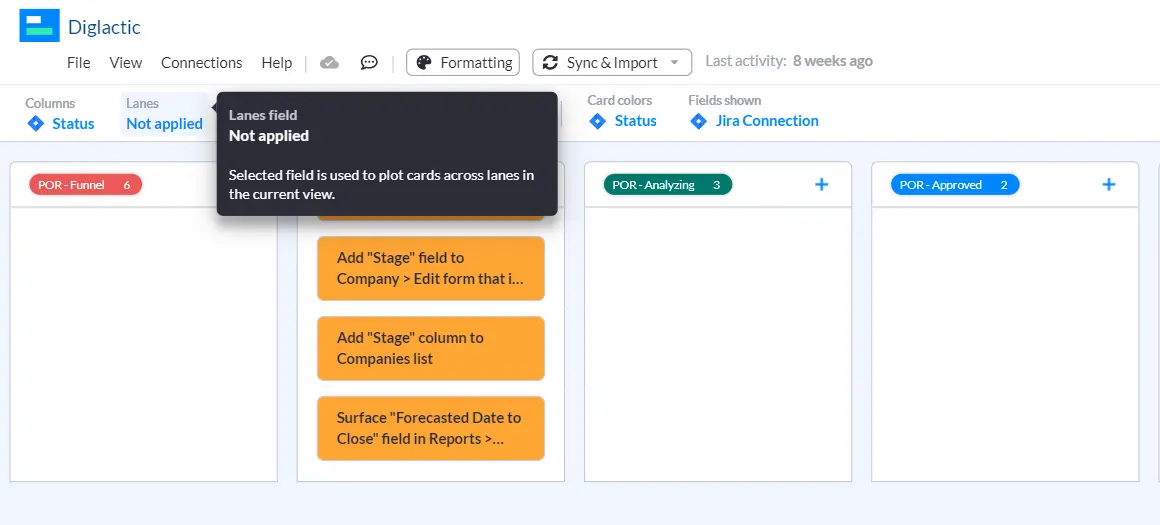
Select the Lanes dropdown menu and choose the swimlane you’d like to use. Visor will adjust your swimlanes accordingly.
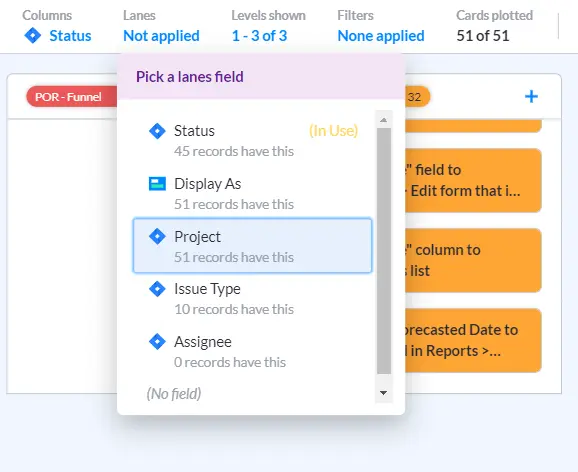
Choosing the Right Tool for Creating Agile Board Swimlanes
Agile board swimlanes are a simple way to make the already useful Kanban board more organized and easier to read. Swimlanes help categorize data, providing a straightforward framework for organizing tasks and projects.
And Visor is a good place to start when you’re considering how to create your next Kanban board. Visor lets you manage and visualize your Jira projects in many ways, including charts and boards with swimlanes. in addition, Visor offers additional swimlane options that aren’t available in that software.
With Visor, you can create custom swimlanes that fit the needs of your team and filter them in ways that aren’t available in Jira. You can also share your data with stakeholders that aren’t as Jira-savvy as you, opening up your data to a broader audience and making your plans clear to everyone who needs to understand them.
In addition, Visor offers many other types of views. You can use our Table or Gantt viewswhen creating external-facing reports or for internal purposes. We even offer templates like a Mutual Action Plan with our spreadsheet-like Table view or our Gantt view with an IT project plan template.
Visor is flexible and easy to use. Get started today for free.


